On the 30th Genocide Run, Sans was napping at his sentry station, as usual, when a figure appeared throughout his fantasies. Sans recognized who this was while he was informed of Frisk's intentions to forever use monsters as their puppets and slaughter them. Skeptical at first, Sans refused to believe so; the mysterious stranger then resurfaced past Genocide timelines throughout Sans' mind. (Source: https://undertale-au-fanon.fandom.com/wiki/Sans_(Undertale_Last_Breath).
Phase 1[]
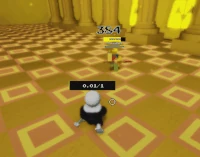
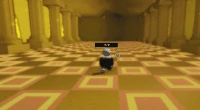
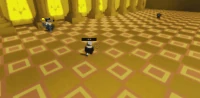
In the original game, Sans says he is "giving his all" despite it being almost the same attacks and this phase lasting shorter than the original game. However, in judgement day last breath phase 1 is much stronger than normal sans.
Music: Not A Slacker Anymore by Benlab
| Attacks | Information | Cooldown | Special Effects |
|---|---|---|---|
| Blaster Wall | A ton of Gaster Blasters appear at the front of the corridor that shoots white beams leaving a space to dodge it doing high damage, same with [Glitchtale's] but more damage
|
18 Second Cooldown | KR |
| Giant Blaster | A large Gaster Blaster appears in the middle of the corridor loading a large beam and eventually firing doing high damage
|
16 Second Cooldown | KR |
| Spinning Bone | A long bone appears on the ground spinning counterclockwise doing good damage
|
8 Second Cooldown | KR |
| Last Breath Blaster | Gaster Blasters appears and auto aims at the Chara Team (1 Blaster per person) doing high damage
|
5 Second Cooldown | KR |
| Bone Throw | Sans summons bones above him before going in the direction he is facing
|
5 Second Cooldown | KR |
| Bone Walls | Long lines of blue and orange bones quickly go in the direction of wherever Sans is facing
|
16 Second Cooldown | KR |
Phase 2[]
Music: The Slaughter Continues by Benlab
Phase 2 activates after all of the dodges are out for the first phase. In this phase, after Sans is tired and you hit him, he expects to dust away. However, Gaster protects him and prevents him from dying giving him another chance to fight you. Note: Phase 2 in ULB is being deleted so this will probably be reworked.
| Attacks | Information | Cooldown | Special Effects |
|---|---|---|---|
| Blaster Wall | A few giant Gaster Blasters appear at the front of the corridor that shoots white beams leaving a space to dodge it doing high damage
|
18 Second Cooldown | KR |
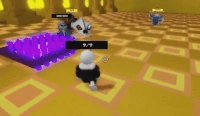
| Bone zone | Spawns Green panels all over the map for the Chara Team to jump on before large bones spawn under doing insane damage
|
39 Second Cooldown | KR |
| Last Breath Blasters | Gaster Blasters appear and auto aim at the Chara Team (2 Blasters per person) doing big damage
|
4 Second Cooldown | KR |
| Force | Sends People on the Chara Team far away from the Sans
|
16 Second Cooldown | None |
| Bone Jumps | A short line of bones appear from the ground and go wherever the Sans is facing at a high speed (Jump = Higher) doing big damage
|
10 Second Cooldown | KR |
| Bone Barrage | A lot of small bones appear from the front and back of the corridor doing big damage
|
22 Second Cooldown | KR |
| Bone Walls | Summons long and wide lines of bones which are orange or blue doing high damage
|
10 Second Cooldown | KR |
Phase 3[]
Music: An Enigmatic Encounter by Benlab
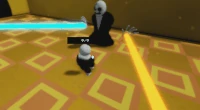
Instead of getting the original moves, you get the FDY remake moves. People on the Chara Team get random heals throughout the battle. 3 minutes until this Sans dies. In this phase, Gaster possesses Sans's body and uses it to fight the human as a last resort.
| Attacks | Information | Cooldown | Special Effects |
|---|---|---|---|
| Gaster Assistance | Summons ☝︎✌︎💧︎❄︎☜︎☼︎ that shoots blue and orange beams from the holes of his hands
|
Used once | KR |
| Folder Bombs | A folder appears on every player's head that drops bombs on everyone on the Chara Team doing 50 damage per bomb.
|
44 Second Cooldown | KR |
| Gaster Blasters | Spawns Gaster Blasters that auto aim to everyone in separate directions on the Chara Team doing big damage
|
13 Seconds Cooldown | KR |
| Bone Walls | Summons long and wide lines of unavoidable bones which are blue and orange doing high damage. A giant Gaster Blaster (same as phase 1's) also appears in the middle of the front of the corridor when this attack is activated.
|
13 Second Cooldown | KR |
| Blaster Circle | Summons a circle of Blasters that shoot one by one in a counter-clockwise direction doing insane damage
|
45 Second Cooldown | KR |
| Spinning Bone | An extremely long bone appears in a + formation spinning. One bone is blue an the other is orange doing high damage
|
13 Second Cooldown | KR |
Former/Scrapped Phase 3[]
This is the old moveset for phase 3. Appearance in the new version stays the same as old one. Screens randomly flip.
| Attacks | Information | Cooldown | Special Effects |
|---|---|---|---|
| Blaster Wall 3 | 3 large Gaster blasters appear from the front of the corridor in random places shooting large beams where the Gaster Blasters are facing | 9 Seconds | KR |
| Tracking Blasters | Gaster Blasters appear targeting every player on the Chara Team (3 Gaster Blasters per player) | 4 Seconds | KR |
| Gaster Assistance | Gaster appears shooting wing ding letters at everyone on the Chara Team |
Can only be used once | None |
| Bone Barrage | Small bones come from the back and front of the corridor for 9 Seconds | 15 Seconds | KR |
| Bone Jumps | Lines of bones appear and go wherever the Sans is facing them | 12 Seconds | KR |
Death Cutscene[]
In rework version, after you beat Sans in Phase 3, there is a little cutscene when the music is about to finish, Sans stands still in a sad emotion, then the Chara team slashes him. After that, Sans fades away into dust.